

Blender 2.4 Basics
Creation date: 2007-11-13Last update: 2010-4-25
This is a first part of my Blender tutorials. Upcoming tutorials will handle materials, fluid dynamics, node editor and maybe rigid body physics. The first part will teach you the very basics of Blender's complex GUI.
Blender is a software for creating, animating and rendering 3D content and it is the most advanced free 3D-software available at the moment. It is open-source and multi-platform compatible.
You can download Blender here : Blender
Tutorial contents
1. Configuring Blender2. Saving and loading
3. Handling views and creating objects
4. Rendering the scene
5. Transforming and duplicating objects
6. Setting up lighting
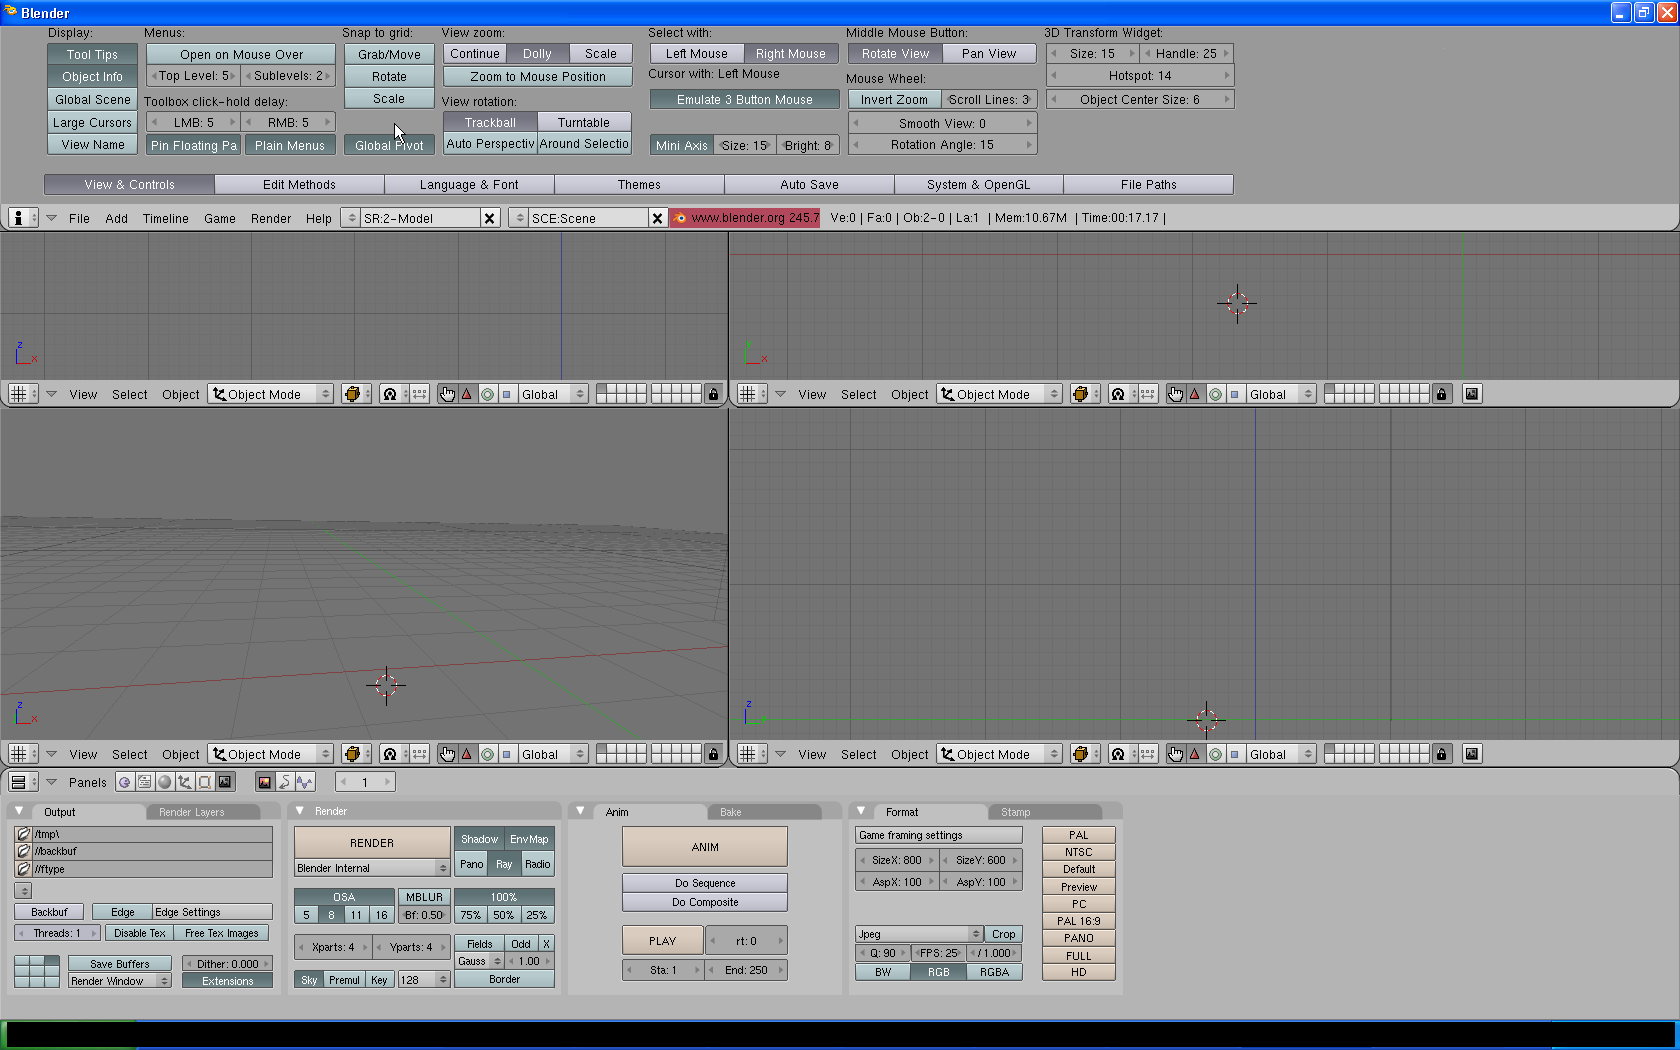
1. Configuring Blender
The default view in Blender should look something like this:
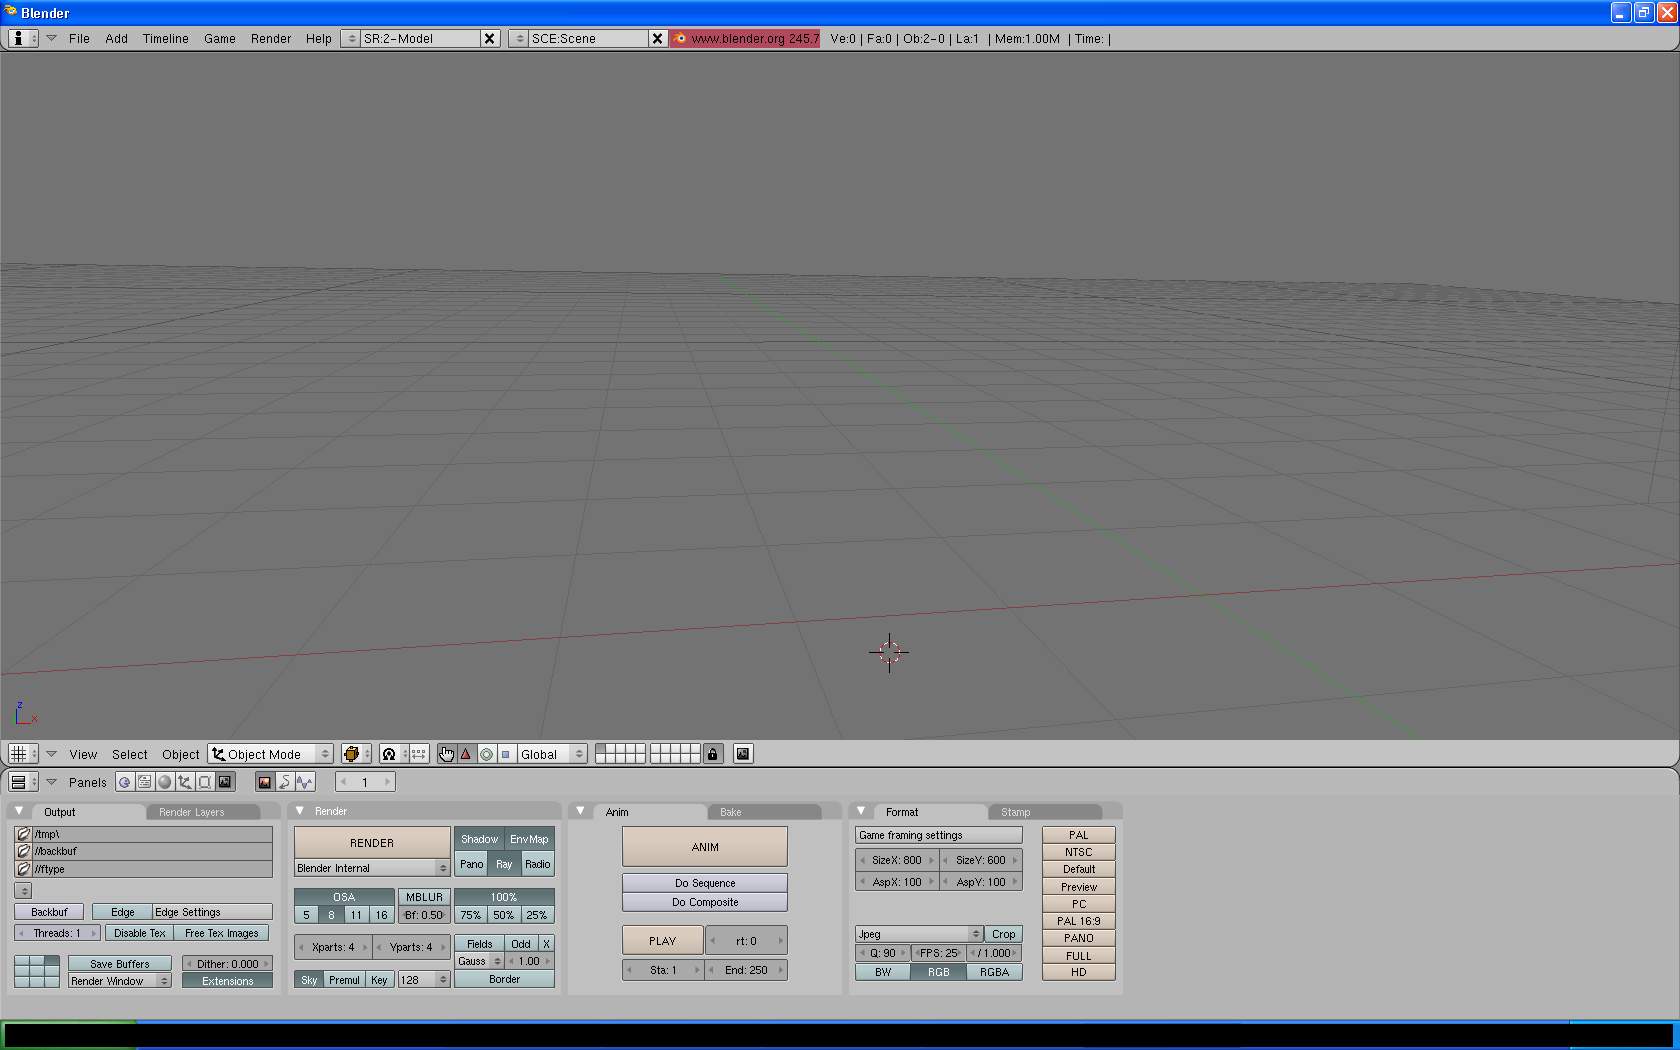
The first thing to do before you start using Blender is to configure the viewport.:
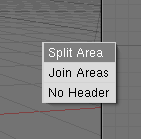
Right click the edge of the top header. Then select "Split Area". Move your cursor in the middle of the view and left click, and you'll have the view divided in two parts.
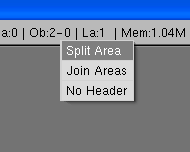
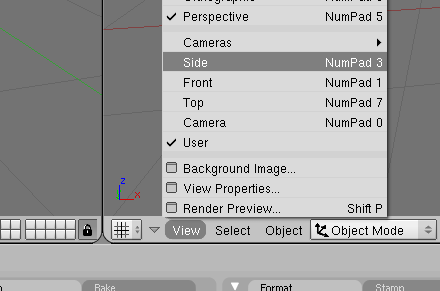
Press the "view" menu below the new viewport, and select "Side" or any other camera angle. Then click it again and select Orthographic. (To make it to show 2D version of the scene)
If you like to have more views, like most 3D-modeling software, divide the two views into another two or so.
If you make a mistake, you can "delete" a view by selecting "Join Areas".
Set every view into different angle and set "Side", "Top" and "Front" views as orthographic (no perspective) and "Camera" or "User" views as perspective.
There are many ways to set up views. Some people like to have just one or two views and change them by Numpad shortcuts.
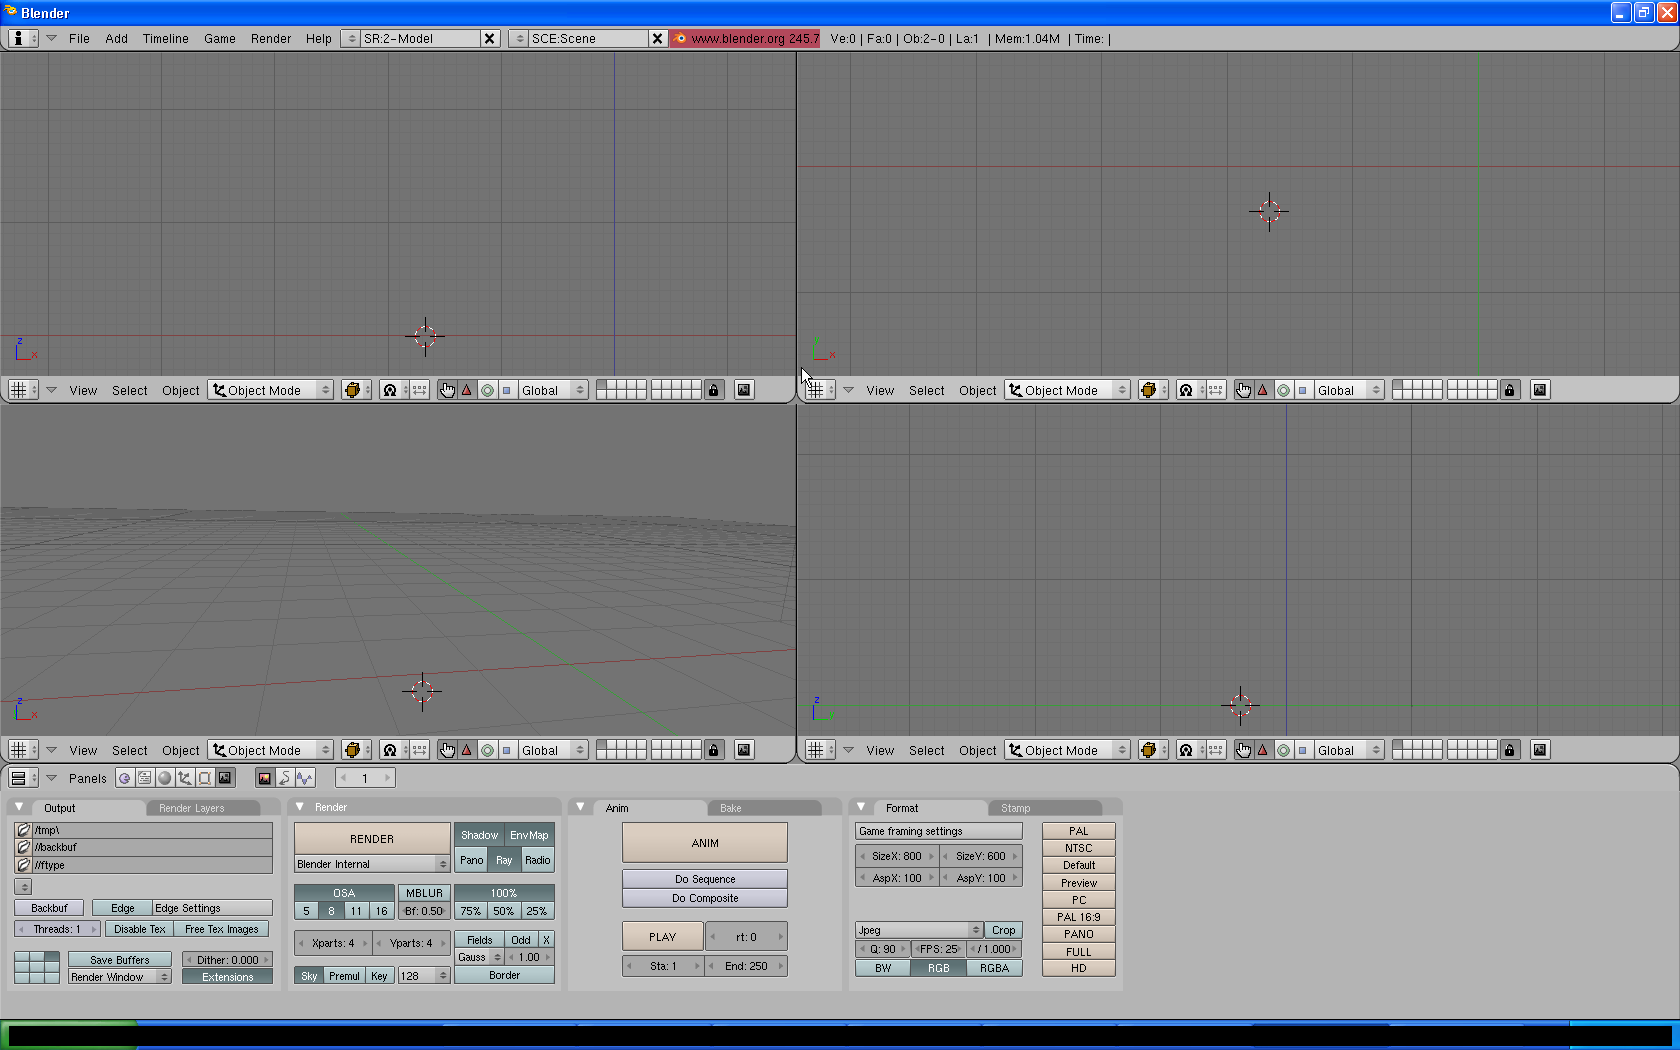
However, if you like to have four views the final scene may look something like this:
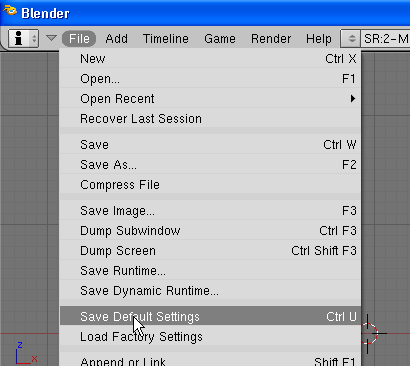
When you are happy with the result, click File -> Save Default Settings. And the current scene will be shown every time you start Blender.
Easy access to Blender's option menu is to drag down the top panel. The settings menu will show up. Here you can change some basic setting like default keys to handle views, number of undo steps, Blender folders and such.
2. Saving and loading
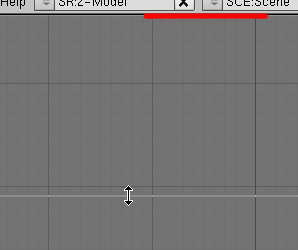
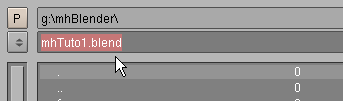
When you need to save the scene, select File -> Save As. One of the viewports will turn into a save dialog.
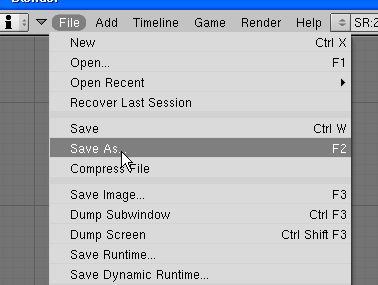
To change target drive use the arrows icon and select the drive. To move to a previous folder use the DOS-style ".."-folder.
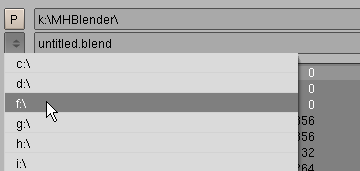
Then write the file name into that field below a file path box and press Save As. To load the scene do just press File -> Open, and select one *.blend file.
3. Handling views and creating objects
To move around the scene press SHIFT + Middle mouse button and drag the view. If you don't press SHIFT at the same time, the view will be rotated, and that's what you most likely don't want to do when handling orthographic views. (Because you'll have to set it back to Side, Top or Front if you do so). That's what is annoying many new Blender users, but you'll get used to pressing SHIFT during time.
To zoom, use your mouse scroll.
Now we can start creating objects!
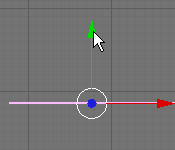
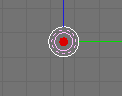
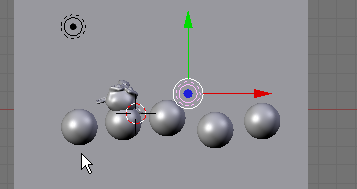
The red circle in this picture is a "3D cursor", it defines where new objects will be placed. To change its position, just left click somewhere on the view.

When using Blender you have to get used to hotkeys and shortcuts. It is simply easier to press a button than click tons of menus.
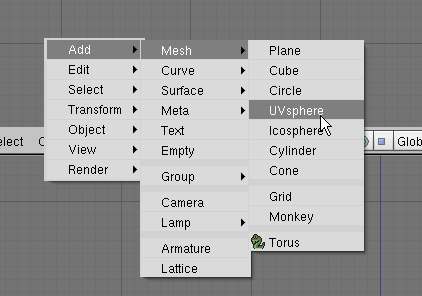
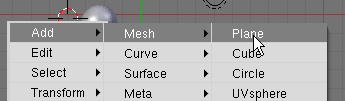
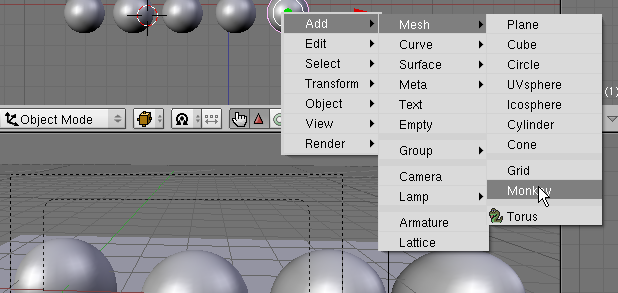
To create a new mesh, you can use space bar to open the menu. Then click Add -> Mesh -> and that primitive you'd like to create .
Note that object will be rotated by the active viewport, so it is recommended to activate (by moving mouse cursor on it) one of the orthographic viewports.
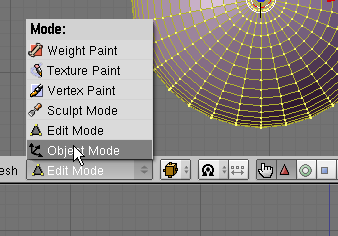
After adding a mesh, Blender will automatically select the "Edit Mode" that allows you to edit selected mesh.
But because this is not a modeling tutorial we'll change it back to "Object Mode", by selecting it from a drop box below any view.
A hotkey to toggle between object and edit mode is Tab (tabulator).
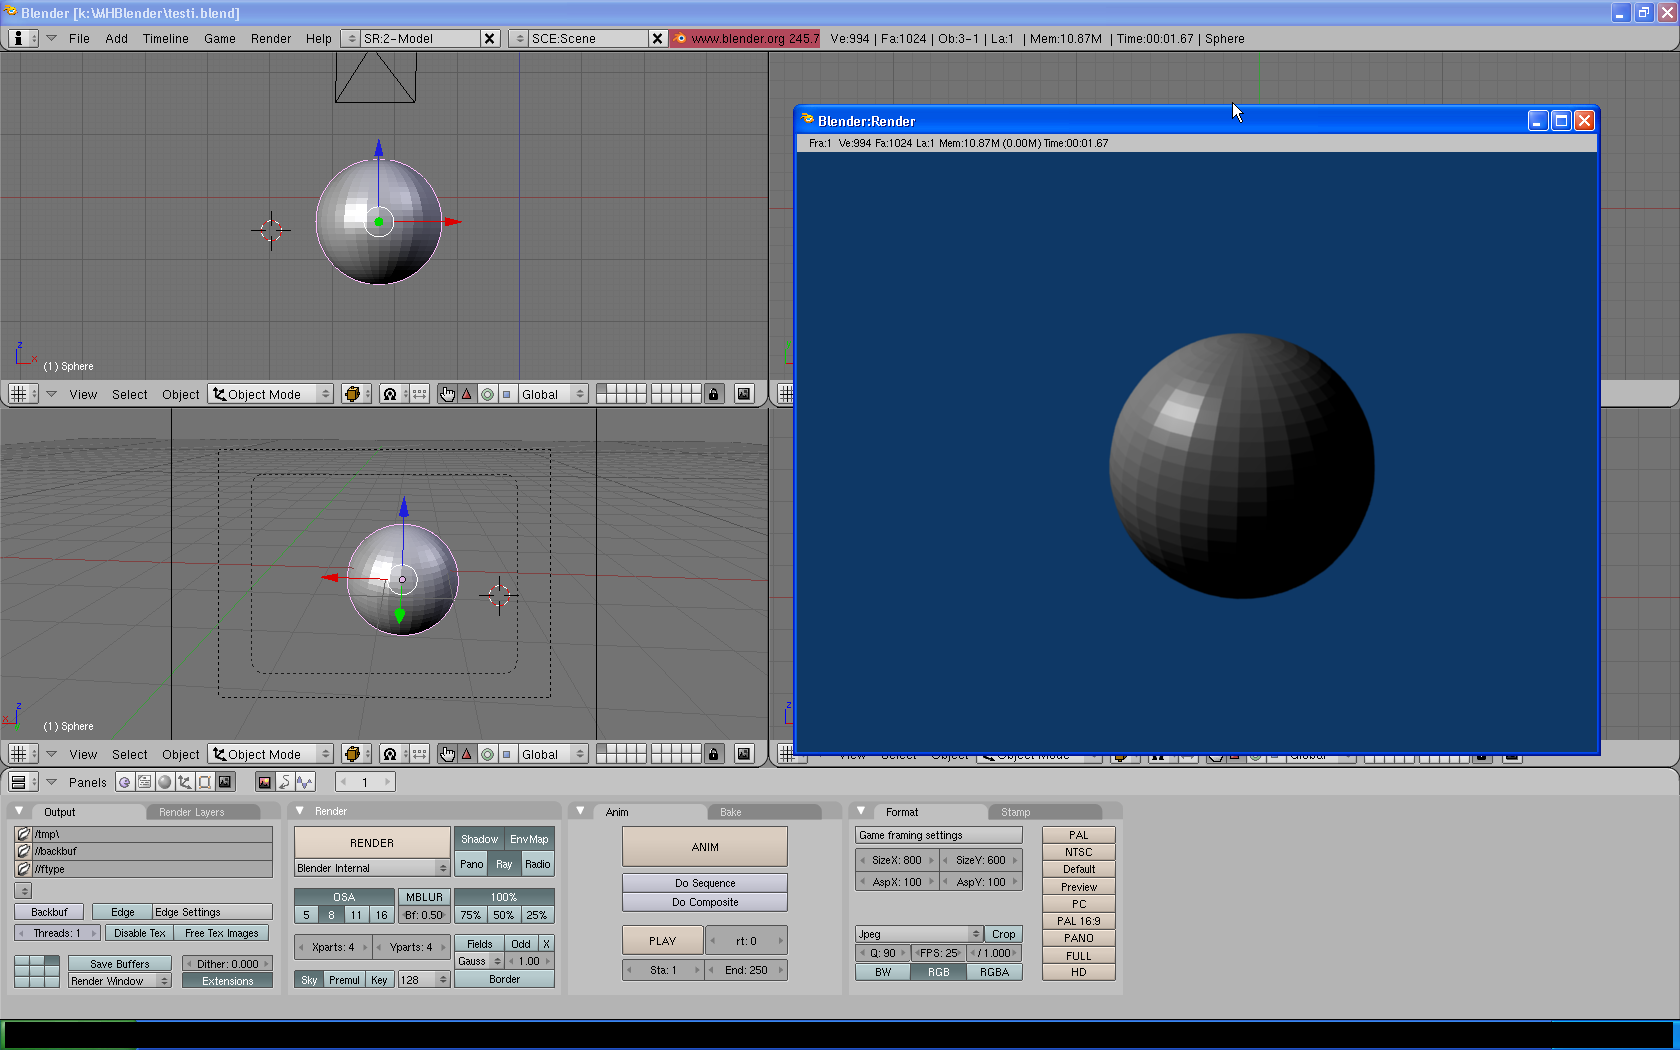
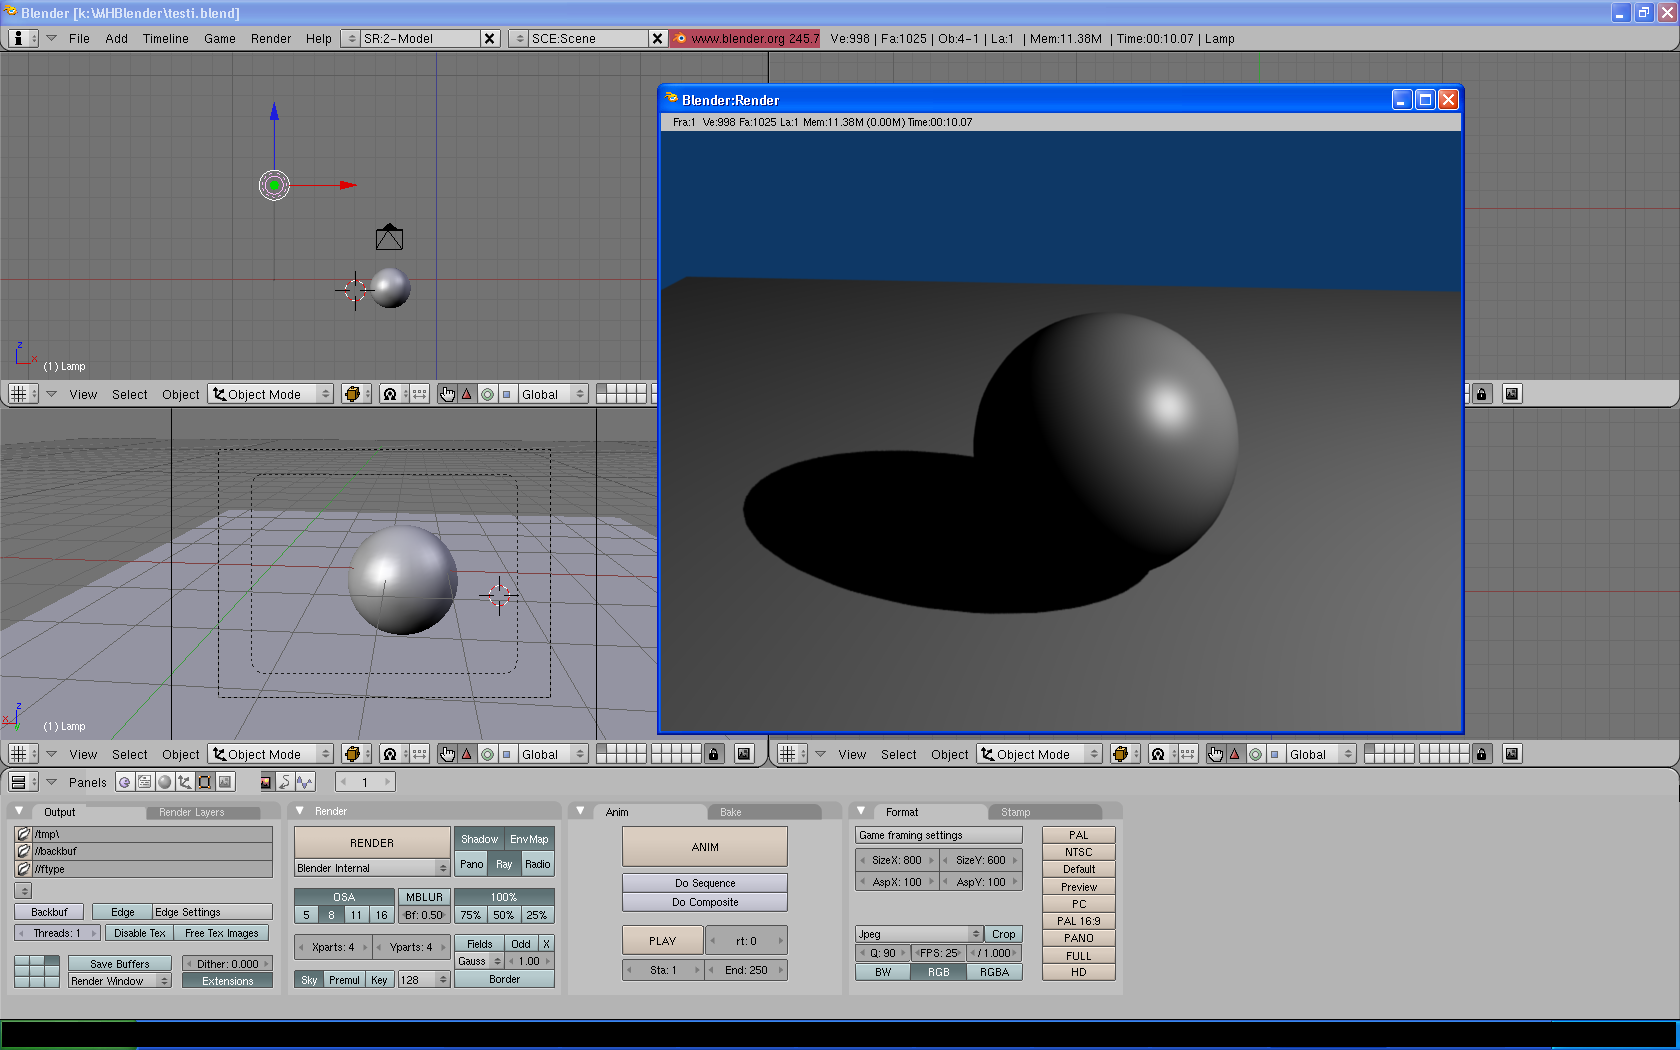
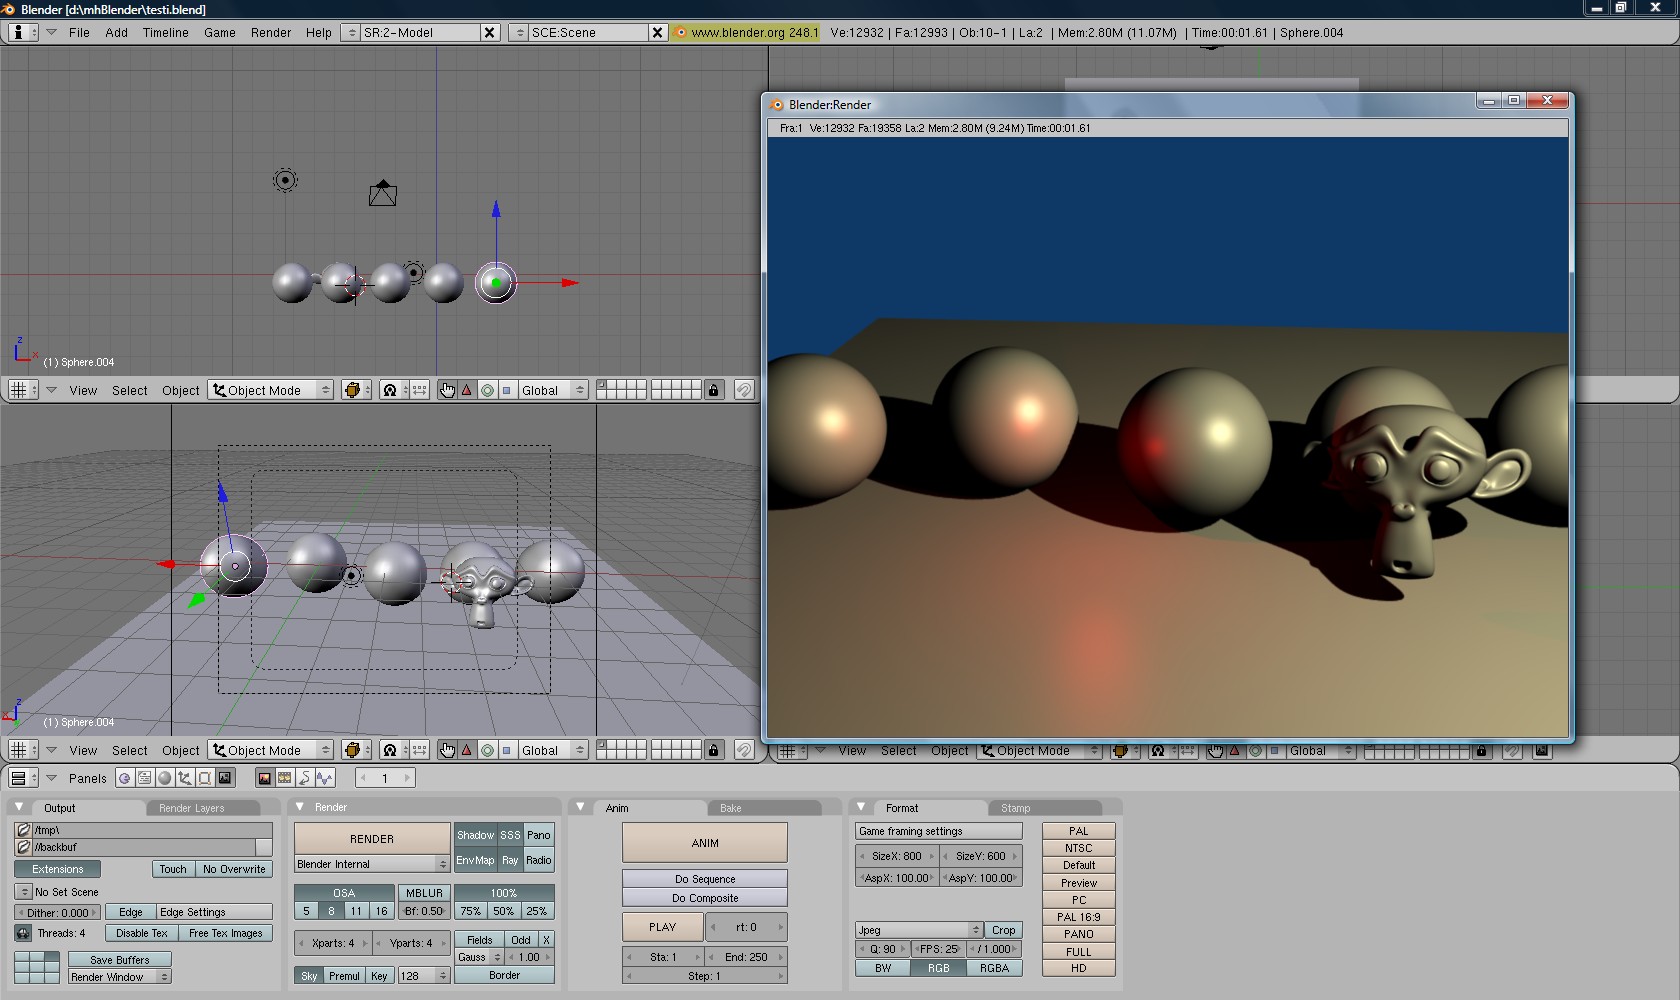
4. Rendering the scene
Next we'll take a look to rendering. It means calculating the final image.
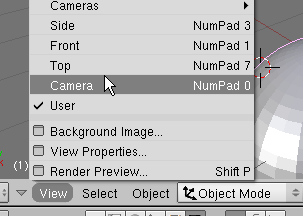
To render an image, first step is to set one viewport to show camera. By pressing View -> Camera below the wanted viewport (probably the 3D one), or having mouse on that viewport and pressing NUM0.
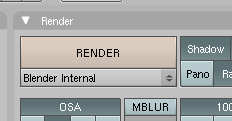
Then move to "Scene" panel. (Hotkey F10)
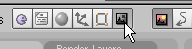
And press "RENDER". (Hotkey F12)
You'll see how scene is getting rendered to a popup window. To save the rendered image, press File -> Save Image or use F3 hotkey
However, that is pretty crap looking scene.. Nothing but just a ball. So lets build something cooler.
5. Transforming and duplicating objects
On a "top" viewport, add a "Plane" mesh and change back to "Object Mode"
Now we are going to place the plane and the sphere right in front of the camera.
To move an object, you have to select it by left click. And then drag it by holding left mouse button.
A hotkey to move selected object is G
To rotate, press Space->Transform->Rotate.
A hotkey to rotate selected object is R
To scale, press Space->Transform->Scale.
A hotkey to scale selected object is S
You can also use those colored arrows to transform an object along a certain axis.
While transforming an object you can specify the target axis by pressing either X, Y or Z hotkeys.
That is very useful when rotating or scaling objects.

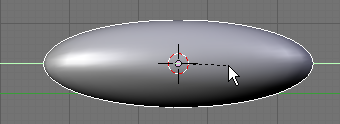
Another problem with that rendered image was the "cubic" sphere.
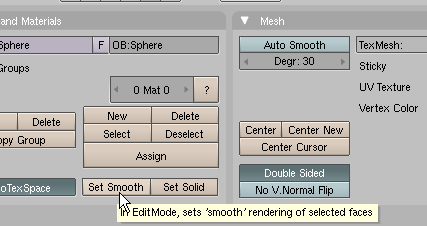
To fix this select the sphere and move to "Editing" panel (Hotkey F9).
Under the Links and Materials block, press "Set Smooth" and the sphere will be rendered as smooth. (It won't change the number of polygons, though.)
Now render the scene by pressing F12, and you'll see how it looks a lot better.
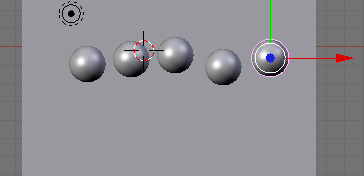
Then we can add some more objects. You can either make a new one or duplicate one of the old objects.
To duplicate an object press SHIFT+D and move your cursor and right click to place it.
You can also try creating other mesh types, like Blender's "Monkey" figure.
If you want to remove an object, select it and press Delete key.
To make sure objects are visible to the camera check that middle rectangle on the camera view. It shows final dimensions of a rendered image.
You can move and rotate the camera object like any other object or select it and press SHIFT+F to enter "fly mode". Turn the camera by moving your mouse and accelerate it by using W,A,S,D as "arrow keys". When you are done flying, left click or press space bar.
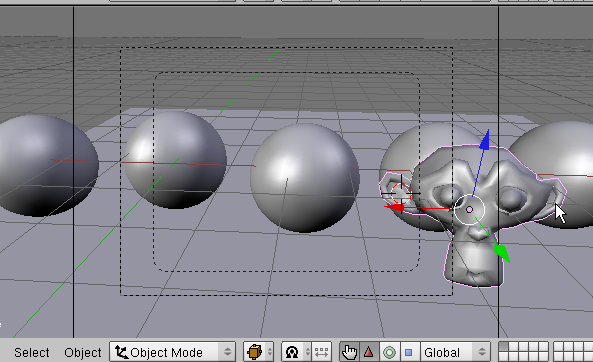
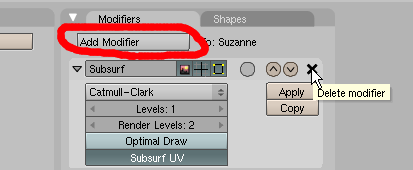
To make meshes more detailed, you can use a Subsurface modifier. To do it: select the target object, move to "Editing" (F9) panel, press "Add modifier" then select "subsurf". You can change preview and render detail levels by changing those values. To remove a modifier press that X icon.
There are also many other modifiers and such, but this is a basics tutorial.
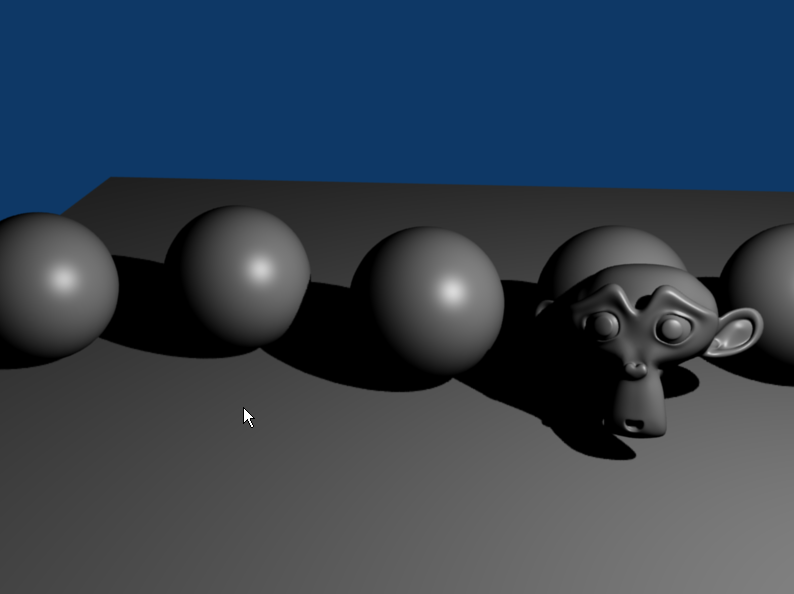
If you render the image now, it may look something like this.
6. Setting up lighting
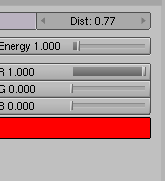
Last basic thing about rendering is to set up lights. Lighting is defined by Lamp objects. One is shown at the picture below.
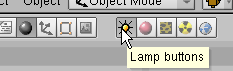
To change lamp properties, select it, move to "Shading" panel (Hotkey F6) and to "Lamp buttons" sub-panel.
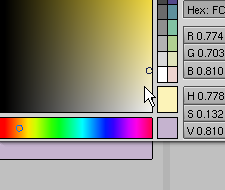
Here you can change it's properties, like color, energy, maximum distance and it's shadow.
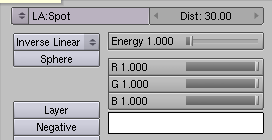
You can create a new lamp by Space -> Add -> Lamp -> Lamp. Just remember that what more lamps you have, the more brighter is the image, so remember to lower the energy of all lamps when adding more of them or you'll end up with render of white objects.
In this example other lamp is defined to cover only a very small distance. And its color is set to red so we can see it.
The final image may look something like this..


 MiikaHweb | 2003-2021