

Avi2DVD guide
Creation date: 2007-12-4Last update: 2010-4-26
It can easily produce DVD-player compatible DVDs with subtitles etc. Unfortunately you can't create multiple scenes or convert multiple .avi files on same DVD. A menu creation system is also very hard to use and limited.
Anyways, Avi2DVD is free and easy to use. Avi2DVD is available for Windows operating systems.
You can download it here : Avi2Dvd
Tutorial contents
1. Input file2. Output settings
3. Select encoder
4. Subtitles
5. DVD menu
6. Producing the DVD
1. Input file
Avi2DVD's basic interface looks like this. On the top menu you can select the used language, on middle you can manage current settings and on below there is a process control menu.
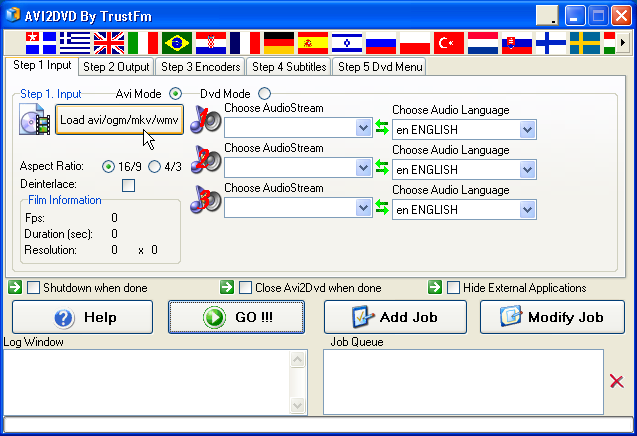
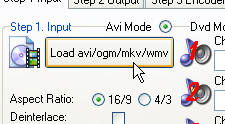
To convert a video file into a DVD open it by pressing "Load avi/ogm/mkc/vmw".
If the source file has more than one audio track, you can select them and their languages from the list boxes.
2. Output settings
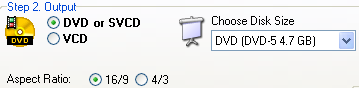
The next tab, Output, defines the target file size and format of the DVD.
You can choose to use either DVD, SVCD (Super-VideoCD) or VCD (VideoCD).
The next menu defines the maximum target file size. At lower sizes, video bitrate will be forced down if the final file size is getting too large.
You can also change the audio bitrate. (Bitrate means the average size of one second of media in bytes. If you don't know what it should be, just leave the default value)

Next you'll see some basic DVD related settings:
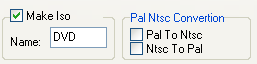
Should Avi2DVD create a .iso disc-image of the final result.
Pal Ntsc conversion is important. If you don't use the right setting your DVD-player or TV may not be able to play the DVD correctly. So if you live in PAL country, make sure that "NTSC to PAL" is selected (if it's not selectable then the source video is already in PAL format and no conversion is needed). For NTSC just select the "PAL to NTSC".
PAL is used in most European countries and Australia, NTSC is used in USA.
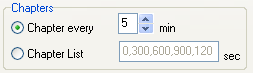
Last option lets you to change the frequency of DVD chapters. (Those that you can jump forward with your remote control)
3. Select encoder
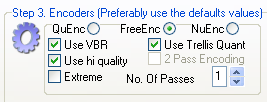
Step 3, Encoders tab lets you change the used video encoder.
Generally QuEnc does a very nice quality but is semi-slow at compressing the video and FreeEnc is very fast but produces slightly lower quality.
If you are just going to convert some stuff into a DVD to watch it on a DVD-player, you can as well use FreeEnc. Basically you won't be able to see any difference in quality, unless you stare the picture on a Full HD screen at close range just to spot errors.
Another important option is the number of passes. If you're happy with "good" quality, just change it to 1. Else video will be compressed twice to ensure maximal quality and compression. Two passes will take twice as much time.
4. Subtitles
Fourth tab, subtitles, lets you choose a subtitle track to your video. Subtitles must be in ".srt" format. If you have subtitles in another format, you can convert them with Time Adjuster.
To choose subtitles, press "Subtitle 1/2/3" button and select the file.
You can also define the subtitle language (it will be shown in DVD player) and font options.

5. DVD menu
The last tab allows you to make a simple DVD menu.
This tool is quite hard to use and very limited, so I dont't bother to write about it.
If you don't make the menu, DVD will automatically start playing the disc when it is put in the drive.
6. Producing the DVD
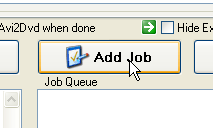
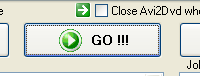
When all the steps are done, click "Add Job", and "GO !!!"
Avi2DVD uses multiple free tools to generate the DVD so don't panic when different pop up windows show during the operation.
Making the DVD on an average computer (3 Ghz,single core) usually takes as long as the source video is. So converting one hour of video may take one hour. Modern quad-core computers will do it alot faster.
Process also needs computing power and memory, so don't expect to be able to do much on the computer during the process. (Its better to do it while you are doing something else.)
When it is ready, just burn the "Avi2dvd_temp\DVD_Image.iso" into a DVD. You can burn it easily with free ImgBurn.
Note that you should use the *.iso to make the disc compatible with all DVD players.
 MiikaHweb | 2003-2021