Blender: Dynamic Paint Basics
Creation date: 2010-8-4Last update: 2011-8-26
Dynamic Paint is a new Blender tool available in versions 2.61 and later. It allows you to use meshes and particles as "brushes" to paint on other objects.
This tutorial shows step-by-step how to set up a simple scene using Dynamic Paint. For a more detailed guide, that explains purpose of all those settings, check my Dynamic Paint Guide.
Check out my blog for more info about Dynamic Paint.
Tutorial contents
1. Initial Setup2. Canvas
3. Brush
4. Baking
5. Rendering
6. Examples
1. Initial Setup
For this tutorial I have prepared a simple initial scene to begin from.
Download the initial *.blend save.
It has an animated sphere to become a Dynamic Paint brush, and a subdivided Suzanne monkey head to become a canvas.
2. Canvas
First I'm going to set the monkey head to a Dynamic Paint canvas. That makes it receive color from brush objects.
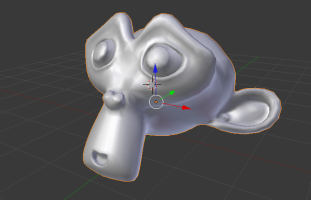
Enable Dynamic Paint Canvas
First select the suzanne object. Then go to the "Physics" tab from top of the properties window.

Now click "Dynamic Paint". A new "Dynamic Paint" panel will appear below. While "Canvas" selected, click "Add Canvas". This will enable canvas properties for current object.
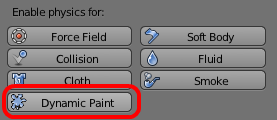
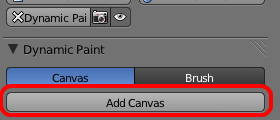
Default canvas settings are fine for this tutorial. I will adjust them further in "Baking" section of this tutorial.
3. Brush
Now setup the "Brush" object. In this tutorial it's the sphere.
Select it and add "Dynamic Paint" modifier from "Physics" tab just like before. This time select "Brush" and click "Add Brush"

Now brush settings are visible. For this tutorial you only have to change brush color.
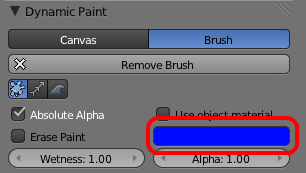
Click the color selection box and change color to blue. That's all for brush settings.
4. Baking
Now that both brush and canvas have been set you are ready to try it out.
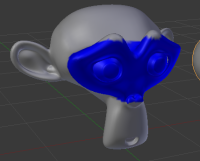
Dynamic Paint is processed real-time as you playback the animation. Click the play icon on the blender timeline or press "Alt + A". You should see blue paint appearing on Suzanne as the sphere touches it.

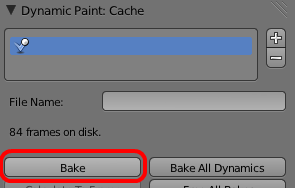
You can also bake canvas, so that current "paint animation" gets saved. To do that, select canvas object and scroll down Dynamic Paint settings until you reach "Dynamic Paint: Cache" panel. Open it and click "Bake".
5. Rendering
To render the result you have to setup a new material that uses vertex colors generated by Dynamic Paint.
Select canvas object and scroll down to "Dynamic Paint: Output" panel. Now click the "+" icon next to "dp_paintmap" box. This will add a new vertex color layer to output canvas results to.

Now you have to add a new material that uses those vertex colors.
While canvas object selected, select "Material" tab and add a new material if required.


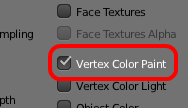
Now scroll down to material "Options" and select "Vertex Color Paint". This will make material to use vertex colors.
If you render now, you should see paint on canvas mesh. You can also change brush object material to blue. Here is the final render:


 MiikaHweb | 2003-2021